Nginx/Tengine 自编译说明
安装云锁的时候,云锁会自动适配nginx版本,使用我们已经预编译好的包含防护模块的nginx文件替换掉您当前系统中使用的nginx文件。卸载时,会将备份的系统原始nginx文件替换回来。因此,云锁可保护使用nginx搭建的网站,开创了这个领域的先河。
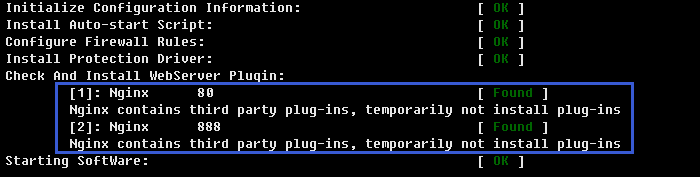
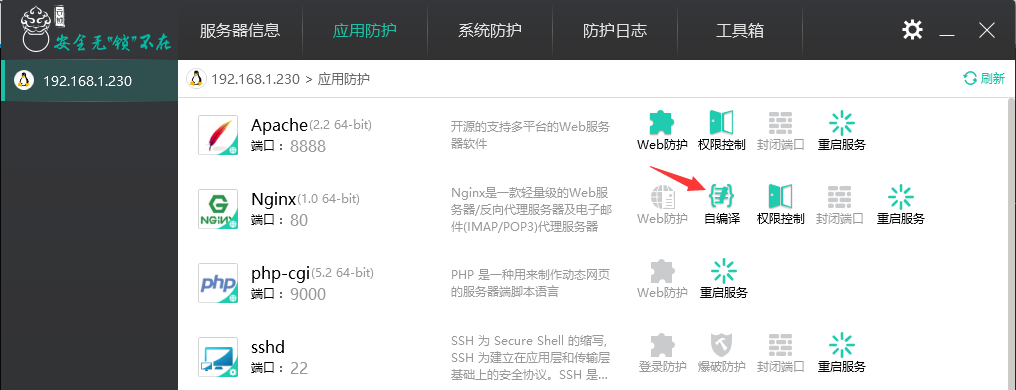
当nginx更新或用户的nginx添加(--add-moudel)了第三方模块时需要用户手工加载云锁的防护模块进行防护。通常在安装时云锁会提示存在第三方模块,且PC端也会有显示需要编译。
安装
[info] 友情提示
在安装防护模块前先重启一次Nginx的服务,确保业务重启后可以正常运行,然后再安装云锁防护模块。
编译前先将已经安装的Nginx文件进行备份,通过ps命令查看nginx文件的路径。以下所有步骤都以自身nginx路径为准。
# ps -elf | grep nginx
# cd /usr/local/nginx/sbin/
# cp nginx nginx.bak
过步骤1查看的路径跟-v参数查看当前Nginx版本,如有源码包则忽略此步骤。无源码包则到Nginx官网下载Nginx源码包,源码包需与自己的当前Nginx版本匹配(假设当前Nginx版本为1.10)。宝塔面板Nginx源码路径:/www/server/nginx/src/;Oneinstack的Nginx源码路径在oneinstack目录下:oneinstack/src/。
# /usr/local/nginx/sbin/nginx -v
# wget http://nginx.org/download/nginx-1.10.1.tar.gz
解压nginx源码包
# tar zxvf nginx-1.10.1.tar.gz
由于其默认不支持post过滤,所以需要修改Nginx文件。1.8.0 版本以下修改源码目录下ngx_http_upstream.c文件(Nginx 1.8.0 及以上版本和Tengine跳过该步骤)。在
static void ngx_http_upstream_init_request(ngx_http_request_t \*r);行上方添加:int ngx_http_yunsuo_post_in_handler(ngx_http_request_t *r);和在ngx_http_upstream_init_request后,添加:if (ngx_http_yunsuo_post_in_handler(r)) { return; }# cd nginx-1.10.1/src/http/ # vi ngx_http_upstream.c--------------------下面这段是添加的---------------- int ngx_http_yunsuo_post_in_handler(ngx_http_request_t *r); -------------------------------------------------- static void ngx_http_upstream_init_request(ngx_http_request_t *r) { ngx_str_t *host; ngx_uint_t i; ngx_resolver_ctx_t *ctx, temp; ngx_http_cleanup_t *cln; ngx_http_upstream_t *u; ngx_http_core_loc_conf_t *clcf; ngx_http_upstream_srv_conf_t *uscf, **uscfp; ngx_http_upstream_main_conf_t *umcf; --------------------下面这段是添加的---------------- if (ngx_http_yunsuo_post_in_handler(r)) { return; } -------------------------------------------------- if (r->aio) { return; }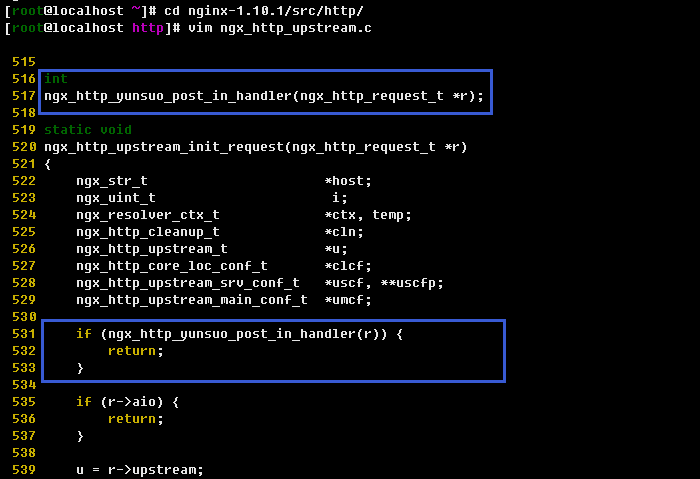
下载云锁防护模块压缩包
# cd /root/
# wget https://codeload.github.com/yunsuo-open/nginx-plugin/zip/master -O nginx-plugin-master.zip
解压云锁防护模块压缩包nginx-plugin-master.zip
# unzip nginx-plugin-master.zip
获取当前云锁模块所在目录的全路径
# cd nginx-plugin-master/
# pwd
查看当前nginx加载的模块,在编译加载云锁防护模块的时候仍需加载这些模块
# /usr/local/nginx/sbin/nginx –V
进入nginx源码目录,对nginx进行编译;编译时在第8步获取的nginx原有模块后添加云锁防护模块,模块路径为第7步获取的云锁防护模块源码全路径“/root/nginx-plugin-master”
# cd nginx-1.10.1/
# ./configure --prefix=/usr/local/nginx --with... --add-module=/root/nginx-plugin-master
Nginx1.8.0 以上和 Tengine 2.2.0 则需要修改objs/Makefile文件和objs/ngx_modules.c来支持post过滤和内容过滤。
首先,在Makefile文件中的
CFLAGS=...-Werror -g后追加宏定义-DHIGHERTHAN8# vi objs/Makefile CFLAGS = -pipe -O -W -Wall -Wpointer-arith -Wno-unused-parameter -Werror -g -DHIGHERTHAN8
其次,将ngx_modules.c中的
&ngx_http_yunsuo_module,向下移动到ngx_http_userid_filter_module和ngx_http_headers_filter_module之间。(已在此之间的则可忽略)# vi objs/ngx_modules.cngx_module_t *ngx_modules[] = { &ngx_core_module, ...... &ngx_http_upstream_keepalive_module, &ngx_http_upstream_zone_module, -----------下面这行向下移动---------------- &ngx_http_yunsuo_module, ------------------------------------------ &ngx_http_stub_status_module, ...... &ngx_http_userid_filter_module, ---------------移动到该位置----------------- &ngx_http_yunsuo_module, ------------------------------------------- &ngx_http_headers_filter_module, &ngx_http_copy_filter_module, &ngx_http_range_body_filter_module, &ngx_http_not_modified_filter_module, NULL }; char *ngx_module_names[] = { "objs/ngx_modules.c" 186L, 6441C ...... };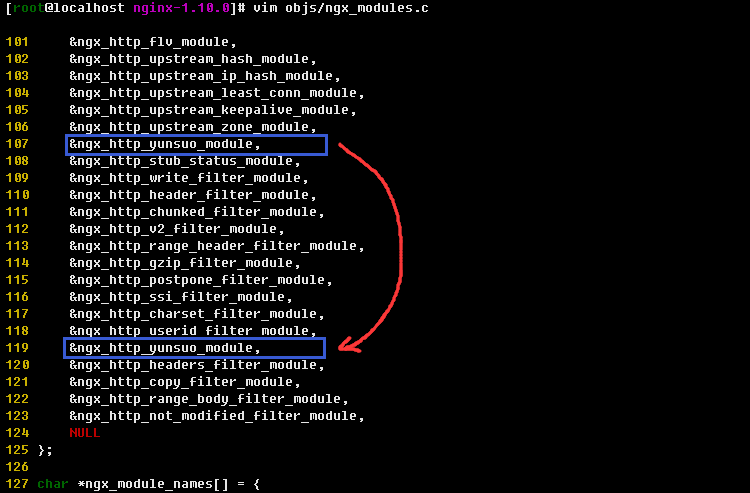
configure完成后进行make(如原本无nginx,make后还需make install)
# make
make完成后将系统中原有的nginx用重新编译生成的nginx文件替换,替换后重启nginx使新编译nginx生效
# rm -rf /usr/local/nginx/sbin/nginx
# cp objs/nginx /usr/local/nginx/sbin/
# service nginx restart
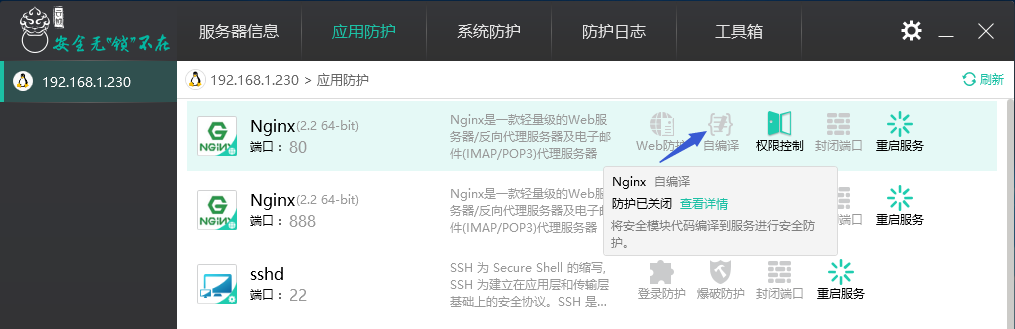
到此通过PC端连接到服务器端,在PC端的界面上可以看到已识别nginx插件。
卸载
使用nginx.bak文件替换掉自编译的nginx文件,替换后重启Nginx。以下nginx路径与上述安装路径一致,实际以自身nginx路径为准。
   # cd /usr/local/nginx/sbin/
   # rm -rf nginx
   # mv nginx.bak nginx
   # service nginx restart
FAQ
什么情况下需要自己编译云锁的nginx模块?
1) 当您的nginx使用了第三方或者自己开发的模块的时候,需要编译云锁的nginx模块。您可以通过nginx -V命令查看输出的信息里是否包含了--add-module=的字样 (例如:--add-module=../ngx_cache_purge-1.3说明使用了ngx_cache_purge-1.3第三方模块)
2) 当使用tengine的时候,需要编译云锁的nginx模块
3) 当前使用的nginx版本比云锁适配的nginx版本高的时候,需要自己编译云锁的nginx模块
卸载云锁后nginx需要重新编译吗?
不需要,云锁的nginx模块会判断防护模块是否安装,如果不安装则不生效。当然您也可以替换回之前的nginx
编译时可能出现的几种错误解决方法
 1)遇如下错误信息 : cc1: all warnings being treated as errors, 编译器把   警告信息作为错误处理了
    解决: 修改 objs/Makefile
    把CFLAGS = -pipe -O -W -Wall -Wpointer-arith -Wno-unused-parameter    -Werror -g修改为:CFLAGS = -pipe -O -W -Wall -Wpointer-arith -Wno-unused-parameter -g即去掉-Werror选项
    重新 make, 注意是重新make 而不是重新 ./configure

 2) 遇如下错误信息:undefined reference to `dlclose',由于编译器版本过高,需要在链接时,加入-ldl 选项
    解决: 修改 objs/Makefile
    搜索 -lpthread,定位到该行结束,加入 -ldl
    形如 -lpthread -lcrypt 修改为 -lpthread -lcrypt -ldl
    重新 make,注意是重新make而不是重新./configure